
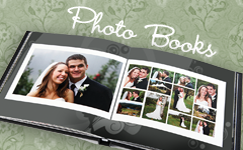


Photo Book User Guide
Introducing IslandPhotoBox Photo Books, a fun way to preserve and present your cherished photo memories in an elegant manner. Creating your very own customized photo books has never been easier!
IslandPhotoBox Photo Books offers a wide array of tools and features to design and enhance your project, including:
- Individual page layout
- Templates – applied to complete book
- Picture borders
- Page backgrounds
- Resizable picture frames
- Easy picture distribution
- Flexible placement of pictures or snap-to-grid
- Picture cropping, resizing, & rotation
- Drag & drop placement of pictures
- Fading control of pictures and backgrounds
- B&W and sepia filters
- Captions – anywhere
- Drag & drop placement of design elements
How to create a photo book
- Double click the Photo Books desktop shortcut.
- A Welcome dialog will come up. Click Create New Book.
- Now, choose a size for your photo book (8.5x8.5, 11x8.5 portrait, and 8.5x11 landscape). NOTE: All photo books have a minimum of 20 pages with a maximum of 176 pages for hardcover and softcover books and a maximum of 60 pages for lay flat books.
- You should now see the Photo Book workspace. Use the Image Browser at the bottom of the workspace to load pictures to use for your photo book. To do so:
- Click the Add Picture or Add Folder (of pictures) icon at the left of the Image Browser. You can then drag & drop pictures directly from the Image Browser and onto your photo book pages.
- If you are using layouts or templates, you can use the Distribute Pictures command (under the Layout menu) to automatically distribute your pictures amongst the pages.
- Toggle between the various page display options seen as tabs on the Image Browser:
- Page Layouts – preset arrangements of picture-ready picture frames. Once applied to a page, you can still rearrange the layout elements any way you choose.
- Page Backgrounds – various colors, textures, and designs you can apply to your pages.
- Picture Borders – borders of various color and thickness you can apply to pictures.
- Templates – themes that can be applied to your entire photo book. Once applied to a page, you can still rearrange the template elements any way you choose.
- To navigate the pages of your photo book, click the desired page in the Pages Browser. You can also navigate using the navigation arrows located on the toolbar.
- When you’re done designing your photo book, click the Send To IslandPhotoBox button to upload your project to our production facilities.
All of these items can be dragged & dropped directly onto a page (or frame, as the case may be).

My Photo Calendars and Cards User Guide
My Photo Calendars and Cards is the premier software package for creating and printing personalized calendars, greeting cards, postcards, and more.
This short document provides information on how to use the software.
Installation
Windows Users
Double-click the file MyPhotoCalInstaller.exe to install My Photo Calendars and Cards. After installation, My Photo Calendars and this User Guide will be added to your “Programs” menu.
Mac Users
Simply unstuff the MyPhotoCalInstaller.sit archive.
Getting Started
Upon launching My Photo Calendars and Cards, you will be offered Five options:
- Open Saved File - either a calendar or cards project.
- New Calendar -creating a new calendar project.
- New Card - creating a new cards project.
- FastTrack – a guided semi-automated process to create a calendar or cards project.
- Cancel - Quit

Select the option that fits your need. The next window that will open depends on the selection you make here.
NOTE: If you would like to create cards or calendars quickly and with amazing ease, why not give our new FastTrack feature a try. See the section on FastTrack further on for more information.
Creating a customized calendar
Upon selecting New Calendar… from the “Open or Create Project” dialog, a template selection screen will come up.

Select the desired template by double-clicking on it or by selecting it and pressing the OK button.
Each calendar starts with a template, though once selected, you can customize almost any visual aspect of the calendar. Please note: IslandPhotoBox printing services currently prints only 11” x 17” (flat or center bound), and 8.5” x 11” size calendars. Select one of the aforementioned size templates if you are planning to send it to IslandPhotoBox for printing.
Make sure to select the right template size! You can change the template at any point during the design process—just be sure to confirm that your new template is in harmony with the design scheme you have already set. If it isn’t, you can always modify your design scheme to fit the new template.
Templates are designed for specific paper sizes. If you select one template and than change the paper in the printer to a different page size, your calendar will not print correctly.
The software comes with templates in the following sizes:
11” x 17” - Center Fold
Calendar measures 11" x 17" when open, 8.5” x 11” when folded at the center binding. Each 8.5” x 11” page is printed on both sides.
8.5” x 11” - Bound at The Top
Each 8.5”x11” page is single-side printed and bound at the top.
11” x 17” - Bound at The Top
Each 11”x17” page is single-side printed and bound at the top. After double-clicking (or clicking OK), you will be presented with a calendar customization screen:

Here you can specify a starting month & year, a week start day, as well as the sets of holidays that you would like to have printed on your calendar. Note: You can always come back later and modify any of these selections.
After clicking OK, the calendar main project screen will open with the first month displayed:

Navigation
There are two ways to move from front cover to last calendar month. The fastest way is to use the forward/backward arrows in the Management Control Center located at the upper left-hand corner just under the toolbar.

The second way to move from month to month is by using the navigation column located along the left side of the screen. Here you have a thumbnail view of each calendar page. Just click a month and the month will appear on-screen.

Customization
An assortment of customization options is right at your fingertips, allowing you to:
- Add images.
- Add graphic elements.
- Add text.
- Add & edit cell contents.
Each of these options allows customization in a variety of ways:
Images – The quickest way to add the digital photos that you would like have appear on your calendar is to simply drag them from your desktop and onto each month.
You can also drag them to the Images tab of the navigation column (just below the Management Control Center) to use later (you also have the option of using the Add Image & Add Folder buttons located on the Images tab). And of course, you have the option of using the Menu to add pictures (PersonalizeàAdd New Picture…) as well.
Once you have added an image, you can now manipulate it in a variety of ways. First click the image to select it. The Image Management Controls appear:

Using the Image Management Controls (located to the right of the Management Control Center), once you select an image you can:
- Add borders to an image.
- Rotate an image. Don’t worry about making mistakes here – the “reset rotation” button
 will always undo any undesired rotation of an image.
 - Round the corners of an image.
- Fade an image.
- Crop an image. A cropping box will appear over your image. Resize the image as you’d like and click outside of the cropped area to complete the cropping.
- Resize an image to fill the page.
Graphic Objects – You can add a square/rectangular object to customize your design scheme. Just create or select an existing object and the Objects Management Controls appear:

Selected objects:
- Can have their borders adjusted.
- Can have their fill adjusted.
- Can have their borders rounded.
- Add borders and fill.
- Round the corners of borders and/or fill.
- Rotate text. Don’t worry about making mistakes here – the reset rotation button will always undo undesired rotation of text.
Text – You can add text to your calendar and customize it in all of the standard ways. Using the Text Management Controls, additional customizations become available. You can:

Cell Contents – Every aspect of the actual calendar grid can be customized: text, images (you can drag an image to any spot on the grid), cell shape – even the grid itself! Click on any text on the calendar grid and the following Cell Management Controls appear:

Events can be added & edited to the day cells by using the Personalized Events menu items or by double-clicking on a day cell. You also have the option of adding clip-art:

That’s really all there is to designing a calendar. If it seems all too complicated don’t worry; this version of My Photo Calendars and Cards includes FastTrack, our new speedy calendar & card creation tool. See the FastTrack section further on for more information.
There are still some things left to discuss, such as what do you do with your calendar after you’ve finished the design process. We’ll get to that, but first we will discuss some basics. Feel free to skip ahead if you come upon information that you already know.
Toolbar and menu commands
As with all software applications, My Photo Calendars and Cards.has a fairly standard Toolbar and menu arrangement, as well as aspects that are unique to this application. For the sake of brevity, we will discuss in detail only those toolbar buttons items and menus commands that are unique to My Photo Calendars and Cards.
Toolbar buttons – (left to right):

[New] [Open] [Save], [Print] [Undo] [Zoom In] [Zoom out] [Send To IslandPhotoBox] [FastTrack]
Send to IslandPhotoBox – This will send your calendar project to our facilities for professional printing and finishing. When printing at IslandPhotoBox, your calendar will be printed on high quality image quality paper. We use the latest in digital printing technology to produce professional quality results. The calendar will be bound and shipped to your address within a few days, hassle free!
Menu commands:
File Menu
New…
- New Calendar Project…
- This will start you on your way to create a new calendar project.
- New Cards Project…
- This will start you on your way to create a new cards project (more about this in the Cards section).
- New Playing Cards Project…
- This will start you on your way to create a new playing cards project (more about this in the Cards section).
Send To Print At IslandPhotoBox…
This will send your calendar project to our facilities for professional printing and finishing. When printing at IslandPhotoBox, your calendar will be printed on deluxe image quality paper. We use the latest in digital printing technology to produce the finest professional results. The calendar will be bound and shipped to your address within a few days, hassle free!
Preflight/Preview…
This will check to see if your calendar photos are of adequate resolution. Photos whose resolution is considered to be too low (less than 300 DPI) will be listed on a resolution status screen that will come up. This screen will only come up if at least one photo has a resolution below 300 DPI.
Edit Menu
Global Font Change
This allows you to change the font, size, color & style of any or all calendar text at once.
Layout
This allows you to re-order the elements on the page (photos, graphic objects, text). The options are: Bring Forward, Bring To front, Send Backward, Send To Back
Grid
- Define Grid
- Show Grid
- Snap To Grid
This allows you to place a (non-printing) grid over the calendar to help facilitate the design process.

Displays the design grid as an overlay on the calendar.
This will cause dragged or resized images, objects, and text to align with the nearest grid line. Great for achieving uniform alignment of multiple objects.
Personalize Menu
Select Template…
This brings up the template selection screen, on which you have the option to switch from your currently selected calendar template. NOTE: If you decide to switch templates mid-or post-design, please carefully review your calendar to be sure that your design scheme and new template choice are in harmony with each other.
Calendar & Holidays…
The will bring up a screen where you can specify a starting month & year, a week start day, as well as the sets of holidays that you would like to have appear on your printed calendar.
Events…
- Manage Events…
- Insert Events…
This brings up the Events management screen where you can edit and delete existing events.

This brings up the Insert Events screen where new events (with images & clip-art included) can be easily added to your calendar.

NOTE: You cannot delete predefined events (such as national holidays). If you do not want an event to appear on your calendar, use the “Visible” checkbox to hide it. You can also go back to the Calendar & Holidays customization screen (Personalizeà Calendar & Holidays…) and remove an entire set of holidays.
Insert Month Thumbnail
This allows you to add a thumbnail-size calendar to a previous, current, or next calendar month – or any combination of the three. These can be added to specific months or to all months at one time. You can also resize the month thumbnails, and they can be dragged to any location on the calendar page. Even more modifications are possible using the Month Thumbnail Settings screen (just double-click on the thumbnail to bring it up). Below are the menu items that you will see under Insert Month Thumbnail:
- Add To All Months
- Previous Month
- Current Month
- Next Month
Calendar Look
- Lock/Unlock Date Grid
- Date Location…
This allows you to fix the calendar grid in place, or allow it to be moved around on the page.
This allows you to set the location & size of the date cells as they appear on your calendar with pinpoint accuracy. NOTE: You can also use the mouse to relocate and resize the date cells. To enable dragging and resizing using the mouse:
- Click-select the date grid.
- Click the “Unlock Date Grid” icon in the Cell Management Controls. You will now be able to move and resize the date grid manually. Be sure to Lock the date grid (by clicking the “Lock Date Grid” icon) when you are finished.
Changing the date location will change the date location on all pages!

- Days Header…
- Colors & Fonts…
- Day Contents…
- Day Style…
This allows you to change the size & style of the day of the week headers.

This allows you to change the color scheme, font size & style for Empty, Holiday, and Default calendar day cells.

This allows you to customize the location of every aspect of the date cell contents. Just left-mouse button click and relocate any of the various cell aspects for every cell on your calendar at once.

This allows you to customize the day cell border & background color and shape (rounded corners or diamond shaped, in addition to the default square shape). NOTE: The terms “border” and “frame” are used interchangeably with regard to calendar projects.

Localize
This allows you to set the language of static calendar elements to the language of your choice as long as the language is supported by your computer’s operating system.

Add New Picture…
This brings up an Open File dialog from which you can select an image. Acceptable image file types are: JPEG, TIFF, BMP, PNG, and GIF.
Replace Selected Picture…
Insert Object
- Picture…
- Text…
- Graphic Object…
- Clip Art…
- Load Picture…
- Resize Picture To Fill.
This brings up an Open File dialog from which you can select a image. Acceptable image file types are: JPEG, TIFF, BMP, PNG, and GIF.
This adds a text object (default text: “Your Text Here…”) to your calendar page. Please see the Text Management Controls section above for information on editing text.
This adds a graphic object (default: square, frame only) to your calendar page. Please see the Object Management Controls section above for information on customizing graphic objects.
This brings up a clip art selection dialog where you have the option of choosing from an array of clip art images. The clip art that you select will be added to your calendar page, and can be resized & relocated.
Image CommandsThis allows you to replace a selected image or clip art object with an image from your computer. Acceptable image file types are: JPEG, TIFF, BMP, PNG, PICT, and GIF.
This allows you to enlarge a selected image or clip art object so that it fills the entire calendar page, side-to-side & top to bottom.
Helpful Information
Mouse Right-button-Click
Placing the mouse over an object - or anywhere on a calendar page - and clicking the right-mouse button will bring up a context sensitive menu. This menu will include those commands that are relevant to the object/area. These menu commands have the same functionality as the like commands previously described. They also include Cut, Copy, Paste, Delete, and Duplicate, as applicable.
Dragging & Resizing
You can move any object on the page by selecting the Arrow curser in the Management Control Center, clicking the left-mouse button over the object, and dragging.
You can resize a graphic object by selecting it, and placing the mouse at the border or corner of the object until the curser becomes a resizing tool. For example:
NOTE: Pictures may also be resized, but they always retain their original width/height proportion regardless of how large or small they appear on screen.
Creating personalized cards
Upon selecting New Card… from the “Open or Create Project” dialog, a card size/style selection screen will come up. To begin creating a set of cards, a size/style must be specified. Once this is done, nearly every visual aspect of the cards can be customized to suit your needs.
Basically, there are three kinds of cards: Folding cards (greeting cards), Postcards (including wallet cards), and playing cards (which are standard 52 card playing card sets). Folding cards have three customizable surfaces – front, inside, and back. Postcards have two customizable surfaces – front and back, and playing cards have one customizable surface – back.
Make sure to select the right card size! You can change a card size/style at any point during the customization process, but doing so may create problems with the design scheme you have been working on.
Select the desired card size/style and click the “Continue” button.
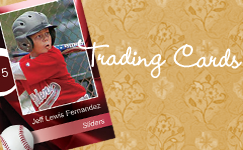
Card Types
My Photo Calendars and Cards allows you to create three different types of cards: postcards, folding greeting cards and Trading Cards. The card image that appears in the main application window will reflect the type of card you have chosen:

Postcards and Trading Cards have two sides: front and back. To switch between the sides, use the “Front” & “Back” buttons at the left of the window, or simply click the desired side in the Pages column (directly under the “Front” & “Back” buttons).

A Folding Greeting Card has three sides: front, back, and card inside. To switch between sides, use the “Front, Back, and Card Inside buttons at the left of the window, or simply click the desired side in the Pages column (directly under the Front, Back, and Card Inside buttons).

Customizing a Card
An assortment of customization options is right at your fingertips, allowing you to:
- Add images.
- Add graphic elements.
- Add text.
Each of these options allows customization in a variety of ways:
Images – The quickest way to add the digital photo or photos that you would like have appear on your card is to simply drag them from your desktop and onto your card. You can also drag them to the Images tab of the Navigation Column (just below the Management Control Center at the left of the window) to use later (you also have the option of using the Navigation Column Add Image & Add Folder buttons located on the Images tab). And of course, you have the option of using the Menu to add pictures (PersonalizeàAdd New Picture…) as well.
Once you have added an image, you can manipulate it in a variety of ways. First click the image to select it. The Image Management Controls appear:

To the image, you can now:
- Add borders to the image.
- Rotate the image. Don’t worry about making mistakes here – the reset rotation button will always undo any undesired rotation of an image.
- Round the corners of the image.
- Fade the image.
- Crop the image. A cropping box will appear over your image. Resize it as you want and click outside of the cropped area to complete the cropping.
- Resize the image to fill the page.
Graphic Objects – You can add a square/rectangular object to customize your design scheme. Just select an object and the Objects Management Controls appear:

Selected objects:
- Can have their borders adjusted.
- Can have their fill adjusted.
- Can have their borders rounded.
Text – You can add text to your card and customize it in all of the standard ways. Using the Text Management Controls, additional customizations become available. You can:

- Add borders and fill.
- Round the corners of borders and/or fill.
- Rotate text. Don’t worry about making mistakes here – the reset rotation button will always undo undesired rotation of text.
Templates (Frames)
To enhance your cards with that special added touch, try adding a template. A template is a frame or border that you can apply to your cards. We furnish you with a wide range of templates for nearly every occasion.
To apply a template to a card (and over an image), first access the card templates by using the PersonalizeàSet Card Template menu command from the main application window.
- Select a template frame from any of the thirteen available categories.
- Import the image you wish to place in the frame (you may do this before template selection as well).
- Resize the image however you want. Note: At this point, the image is above the frame.
- Send the image behind the frame by using the “Edit->Layout” menu (also available by right-mouse-button clicking).
And that’s it! Your image is now framed and your card looks great! If your results are not to your liking – maybe the template style doesn’t fit the image style, for example – you can always go back to the PersonalizeàSet Card Template menu to change templates, or click the “Remove Template” button if you do not want to use a template at all (for now).
FastTrack
Just when you thought that creating calendars & cards couldn’t get any easier! My Photo Calendars and Cards has a new feature called FastTrack that virtually automates the design process. FastTrack guides you all the way along, so that in no time, your calendar or cards project is ready to print!
To use FastTrack to create calendars or cards, begin by clicking the “FastTrack” button on the “Open or create project” dialog:

Next, you will be prompted to select a calendar or cards project:

From this point on, the FastTrack process will proceed with slight variations and depending on whether you choose to create calendars or cards. For example, let’s say you decide to create a calendar project. This is the dialog that will now come up:

Select a size that suits your needs and click “Next”:

Now it’s time to select a design scheme, or “template” for your calendar. Click “Change Calendar Template” to see your options:

The templates are divided by calendar size, though only the relevant tab (the calendar size you had previously selected) will be available at this time. A description of your selected calendar size will appear in the box at the bottom of the dialog. Once you find the template that suits your needs, click “OK”. REMEMBER: you can always use the “Back” button to select different printing options.
Click “Next”. Here you will select a year and starting month for your calendar:

Next, select a national holiday set or sets that you would like to have appear on your calendar:

Next, you will be prompted to add images to your calendar:

You can add images one-by-one to some or to all months, or use the “Auto Fill” option to add the contents of a folder of images. You can also choose to add images later. Once you’ve finished here, Click “Next”:

Here, you have the option to
- Switch out of the automated design mode
- Continue in the automated design mode.
- Send this calendar to print immediately
- Switch out of the automated design mode
- Continue in the automated design mode.
Let’s say you decide to continue in the automated design mode:

Here, you can add captions to each of your months. You can add images now even if you have opted to add images later. Click “Next”:

Again, you have the option to
Let’s say you decide to continue in the automated design mode:

Here, you can choose to display thumbnails of previous/following months on your calendar pages. Click “Next”:

Here, you can add personal events to your entire calendar all at once. REMEMBER: you can always add events later. Click “Next”:

Now, you have two options:
- Continue the guided customization process
- Switch to Advanced Design Mode (i.e. manual mode)
Of course, you can always print immediately with IslandPhotoBox in ADM as well. Once you’ve made your choice, click “Finish”.
The FastTrack process for cards is similar to that of calendars, they key difference being a cropping tool that is available when you select the image that will appear on your cards:

Printing
My Photo Calendars and Cards allows you to send your project to IslandPhotoBox for professional printing. The process is similar for both calendars and cards.
Sending your project to print at IslandPhotoBox
IslandPhotoBox offers high-quality professional printing of your calendars and cards.
Using IslandPhotoBox professional printing service provides you with the following benefits:
- Your cards will be professionally cut & scored. The available stock sizes include those not supported by standard printers.
- Your calendars & cards will be printed on high-quality stock, accentuating the beauty of your photos.
- We use only the latest in digital printing technology. Your calendars & cards will have the look & feel of professional offset printing.
- Your calendars & cards will be and shipped to you quickly, hassle free!
- Print as may copies as desire – the effort on your part never increases, though the cost per copy decreases as the number of ordered copies rises.
- You’ll save money – just add up the cost of high-quality paper, ink, and binders and see for yourself. You’ll be getting professional, high-quality results, while saving time & money.
Printing with IslandPhtooBox couldn’t be easier, so why not go and give it a try! Your order is not complete until you approve it, so there’s no risk.
To print at IslandPhotoBox, you will need to be connected to the Internet and have a web browser. To begin:
- Click the Send to IslandPhotoBox button located on the main window toolbar.
- The software will lead you through the process of creating, uploading, and ordering your calendars & cards.
- The system will process your calendar and prepare it for printing. When this is done, the system will need to upload your calendar to our IslandPhotoBox server for print.
- You are now ready to upload the file to our IslandPhotoBox servers. You will need to be connected to the web to perform this upload. You will get the following dialog box:
- Once the upload is complete, your web browser will launch to our web site.


Choose “View” to view the project file as it will be sent to print in a PDF format. It is highly recommended that you proof your project at this stage. Check for typographical errors, fonts used, missing or low quality images, or any element that may not be displayed properly on the page ― anything that does not look right. How your calendar appears in the PDF file is how it will appear when printed as well. You will need Adobe Acrobat Viewer to view the file. Select the ”Get Acrobat” button to download it from the web. Choose “Continue” to start the upload process. If you wish to correct anything in your calendar project, click “Cancel,” then simply go back to your project and fix what needs fixing, and repeat this process again.

Here you will provide information about the order, such as the quantity desired, the shipping address, and the preferred shipping method. You will approve the cost, provide billing information, and finally, approve the purchase.